
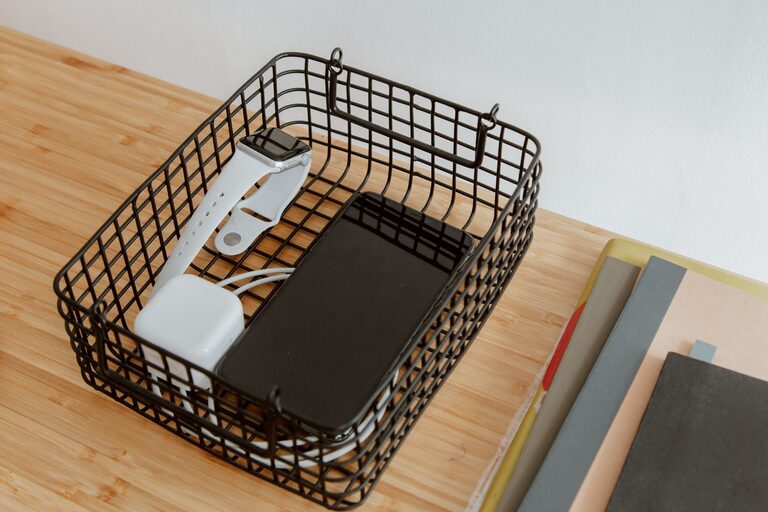
How to Set Up a Convenient Charging Station for Devices
A dedicated charging station can make everyday life more convenient. Instead of searching for open outlets or untangling cables, you can keep your phones, tablets, watches, headphones, and other devices together in one organized place.
Setting up a charging station does not require expensive equipment or complicated installation. With the right location, a few accessories, and some simple cable management, you can create a station that fits your space and routine.
Choose the Best Location
Start by deciding where the charging station will be used most often. A good location should be easy to reach but should not create a tripping hazard or block access to furniture and walkways.
Common locations include:
– A bedside table for phones and smartwatches
– A kitchen counter for household devices
– A home office desk for laptops, tablets, and accessories
– An entryway table for phones, earbuds, and portable chargers
– A family room shelf for shared devices
Look for a nearby wall outlet and a stable, level surface. Avoid placing the station near sinks, showers, or other sources of water. It is also best to keep charging equipment away from direct sunlight, heaters, and areas with poor airflow.
If several people will use the station, choose a central location. If the station is mainly for your own devices, a bedroom or workspace may be more practical.
Decide Which Devices You Need to Charge
Make a list of the devices that should use the station. This helps you choose the right number of ports, cables, and storage spaces.
Your list might include:
– Smartphones
– Tablets and e-readers
– Smartwatches
– Wireless earbuds
– Cameras
– Portable game systems
– Bluetooth speakers
– Power banks
– Laptop computers
You do not have to charge every device in one place. Larger devices, such as laptops, may be more comfortable on a desk, while smaller accessories can be stored and charged in a drawer or organizer.
Count how many devices may need power at the same time. Add one or two extra charging spaces if you expect your collection to grow.
Select a Power Source
The power source is the foundation of the charging station. Depending on your needs, you can use a multiport wall charger, a power strip, or a charging hub designed for multiple devices.
Multiport Wall Charger
A multiport wall charger plugs directly into an outlet and provides several USB ports. It takes up little space and works well for phones, tablets, watches, and other small electronics.
Choose a model with enough ports for your devices. It is also helpful to select a charger from a reputable manufacturer and check that it is designed for the type of devices you own.
Power Strip
A power strip can support chargers with different plugs, including laptop adapters and other larger power supplies. Select a model with enough outlets and a suitable cord length.
A power strip with USB ports can reduce the number of separate adapters you need. However, avoid connecting more equipment than the strip is designed to handle.
Charging Dock or Hub
Charging docks and hubs often combine power and storage in one unit. Some include spaces for multiple phones or accessories, while others are designed for a particular brand or device type.
Before buying one, check that it supports your devices and uses the required connectors. A dock that fits only one cable type may be less useful if your household uses several different devices.
Gather the Right Cables
Use cables that match your devices and are long enough to reach comfortably without creating excess loops. Common connectors include USB-C, Lightning, and older USB types.
To keep the station practical:
– Label cables if several look alike
– Keep one cable for each regularly used device
– Store spare cables in a small container
– Replace cables with damaged insulation or bent connectors
– Choose cables with durable, flexible coverings
– Keep cables long enough for easy use but not so long that they create clutter
Cable labels can be especially useful in a shared charging station. Simple labels such as “phone,” “tablet,” or “watch” make it easier to return each cable to the correct place.
Add Storage and Organization
A charging station works best when it provides both power and storage. Without a place for devices to rest, the area can quickly become cluttered.
Consider using:
– A desktop charging dock
– A cable management box
– Small baskets or trays
– Drawer organizers
– Adhesive cable clips
– A stand with separate device slots
– A shelf with labeled sections
Keep frequently used devices in the front and less frequently used items toward the back. If children or multiple household members share the station, assign each person a specific space.
A charging tray can be a simple and affordable option. Choose one with separate sections for phones, cables, and smaller accessories. Make sure the tray has openings that allow cables to pass through without being pinched.
Manage the Cables
Cable management makes the station easier to use and helps protect the cords. First, route cables from the power source to the storage area. Use clips, ties, or sleeves to keep them together.
Avoid tightly bending cables near the connector, since repeated bending can cause damage. Leave enough slack for a device to be picked up without pulling on the charger.
You can also use color-coded ties or labels to identify different cables. Keep the main power cord along the back or side of the furniture, where it is less likely to be disturbed.
If the charging station is on a desk, adhesive clips can hold cables near the edge so they do not fall behind the furniture. For a station in a drawer, use cable clips or a small organizer to prevent cords from becoming tangled.
Include Basic Safety Practices
A well-organized charging station should also be safe. Follow the instructions provided with each charger and device, and use equipment in good condition.
Keep these points in mind:
– Do not use chargers or cables with exposed wires
– Avoid covering chargers while they are operating
– Keep the station dry
– Do not overload a power strip
– Leave space around chargers for airflow
– Keep cords away from heat sources
– Unplug equipment that shows unusual heat, noise, or damage
– Keep loose cables away from walkways
Do not place devices under blankets, pillows, or piles of clothing while they charge. A hard, open surface allows heat to escape more easily.
If you use a power strip, place it where it will not be stepped on or pressed against furniture. Avoid connecting one power strip to another unless the manufacturer specifically allows it.
Make the Station Easy to Maintain
Once the station is set up, spend a few minutes each week checking it. Remove unused cables, wipe away dust, and confirm that each device has a suitable charging cord.
Every few months, review whether the station still meets your needs. You may need to add another port, move the station to a more convenient location, or replace a worn cable.
It can also help to create a simple household habit: return devices to the station after use and place each cable back in its assigned position. This keeps the area organized without requiring a major cleanup later.
Final Thoughts
A charging station can be as simple as a tray with a multiport charger or as advanced as a dedicated cabinet with built-in cable management. The best setup is one that matches your devices, available space, and daily routine.
Choose a convenient location, provide enough ports, organize the cables, and leave room for safe airflow. With these steps, you can create a tidy charging area that keeps your devices powered and ready when you need them.
